
So today I will be doing a tutorial on how to use Bare Minerals. It's basicaly 3 easy steps that you can take to perfect looking skin. This stuff covers up everything! I got my kit about one year ago and was always planning on doing the before and after, but it's a little bit uncomfortable to put myself here without any cover up. My skin is not even close to being good. But I guess, not everyone is perfect:)
So, let's start!!!

This is the kit I got. I picked out it in FAIR color to best match my skin tone. What's really good about this kit is that it comes with two foundations: a lighter one for winter and darker one for summer:). Bare Minerals starter kit is available at Sephora or online. It come with 2 foundations, warmth powder, mineral veil powder, foundation primer, and 3 useful brushes. And the total cost for this kit is $60 + Tax.

ok, so this is the most difficult part. As you can see in the picture "BEFORE", my face is covered with little red dots (blemishes).
LETS DO IT STEP BY STEP:

1) The first thing that I do in the morning is wash my face. I use either my "Pimple&Blemish Soap" by Christine Valmy or "Epicuren" apricot facial scrub. The reason why I put both of them, is because I use the scrub 3 times a week. The rest of the week I use the soap. After I washed my face I apply "Valnel" moisturizer, also from Christine Valmy. This moisturizer gives my skin that extra moisture and it also serves as an anti-bacterial protection along with the SPF.

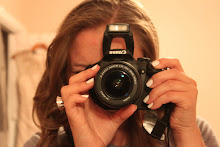
2) Next step is to wash your hands and make sure your brushes are clean. You do not want to use dirty brushes. Bacteria GROWS on those. Especially on concealer brushes.
I use bare minerals brushes a lot. They are very soft!
These 3 brushes are (from top):
Flawless application face brush
Full Flawless face brush
Maximum Coverage Concealer brush

3) Next, I apply my foundation primer, foundation, warmth powder, and mineral veil.
I use 3 simple steps to do that:
SWIRL a small amount of Bare Minerals foundation in the lid with the concealer brush, TAP off any excess, and cover up those dark circles under my eyes, blemishes, brown sun spots. Then, I use Flawless application brush swirl it in the foundation, tap away excess, and lightly buff it into my face. Then I use the Warmth (with Full Flawless brush) in the same way: SWIRL, TAP, and BUFF (circular motions) but only on the parts of my face where the sun is hitting it: cheek bones, nose, chin, upper lip, and forehead. After that I follow with the Mineral veil and Full Flawless brush: SWIRL, TAP, and BUFF. The Mineral veil finishes up the look. It also minimizes pores (you may use the mineral veil as many times per day as you wish). Picture that's labeled "Middle" is the finishing look after I apply Mineral veil.

4)Next I do eyes, and lips. First I prime my eyes with PRIME TIME primer, let it dry for like 30seconds. Then, apply mineral eyeshadow, followed by Boxom Lash Mascara in Blackest Black.

This is the mascara brush up close. It's like a little comb for lashes.
And we are done!!! The lip gloss on the AFTER picture in not really my color, but I wanted to use all Bare Minerals products, so I had to stick to this one. It usually takes me about ten minutes to do all of this (including washing my face). Once you get use to it, you will be very quick!
Good Luck!!!
Olya


this was great!
ReplyDelete